Notegrity Starter Guide | The Plain Text Note-Taking App
Notegrity Starter Guide | The Plain Text Note-Taking App https://notegrity.com/wp-content/uploads/2026/03/thumb-1024x576.png 1024 576 Notegrity https://secure.gravatar.com/avatar/28c6b800ab522934fd98496116fd26358e41cec02c12d671aa4968ff5f82e99d?s=96&d=mm&r=gNotegrity is a plain text note-taking app that acts as a front-end for the files on your local system. It was built for users who want their notes to outlive their tools.
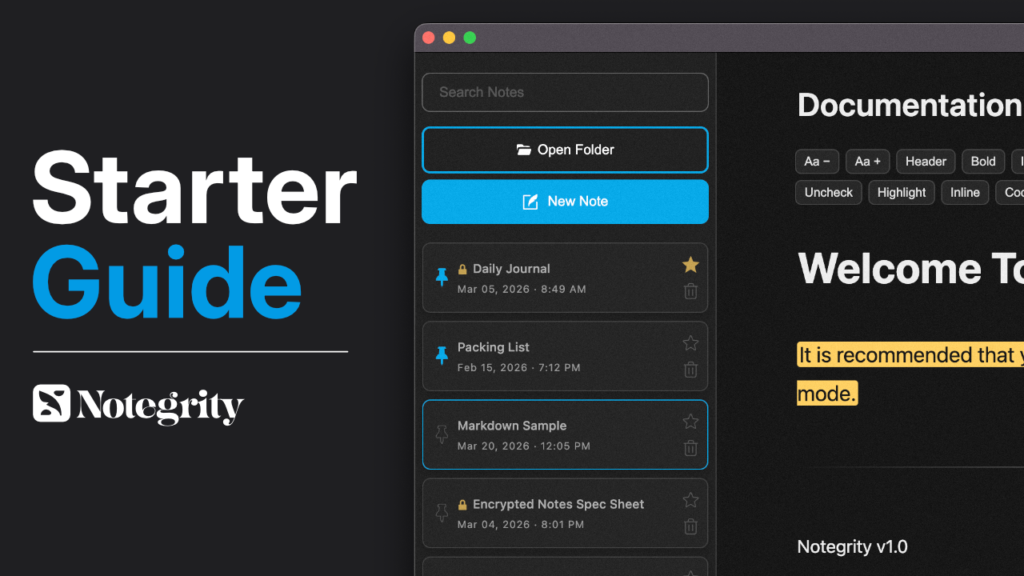
Note: You can access the contents of this article from within the Notegtity application by selecting the Documentation tab within the Help menu.
Instead of storing your notes in a proprietary database or syncing them through a service you don’t control, Notegrity works directly with plain text files on your own computer. You choose a folder, and Notegrity gives you a convenient and modern interface for writing, editing, and managing the files inside it.
Notegrity does not transmit, analyze, or store your notes anywhere but your own device. It’s an offline tool that you can trust and was designed to function like a system utility. Notegrity does not collect any user data nor does it have the ability to.
Because your notes are just text files that use standardized formats, they’re completely interoperable. You can open them in any editor, on any operating system, and with various other note-taking applications.
Table Of Contents
How It Works
Writing Notes
- Writing Notes
- Markdown Preview
- Markdown Insertion Bar
- Deleting Notes
- Renaming Notes
- Pinned Notes
- Marked Notes
Saving Your Work
Customization
Pro Features
Opening Folders
Notegrity does not store notes internally. Instead, it provides an interface for viewing and editing plain text files that already exist on your system. All notes displayed in the sidebar are read directly from the folder you choose to open. Likewise, any new notes you create are saved into that same folder.
Because of this design, selecting a folder is a required first step before beginning work. If you write or edit text without a folder loaded, your content is not associated with any storage location and may be lost. To ensure your notes are saved properly, always open a folder before creating or modifying notes.
To load a folder, click the Open Folder button and select the directory you want Notegrity to use. Once selected, Notegrity will read all supported note files within that folder and display them in the sidebar. You may switch folders at any time, and Notegrity will update its view to reflect the contents of the newly selected location.
This folder-based approach gives you full control over where your notes live. Your files remain accessible through your operating system’s file manager and can be moved, copied, backed up, or synchronized using any method you prefer.
Supported File Formats
Notegrity operates exclusively on plain text files and supports the following formats:
.txt (Plain Text)
Standard text files with no formatting or embedded metadata. These files store only raw characters and can be opened and edited in virtually any text editor on any operating system. Using .txt ensures maximum portability and long-term accessibility.
.md (Markdown)
Markdown files are plain text documents that use a lightweight syntax to represent formatting such as headings, lists, links, images, and emphasis. In Notegrity, Markdown syntax is interpreted only when Markdown Preview mode is enabled. Otherwise, .md files remain fully editable as plain text.
Refreshing Notes
When a folder is opened in Notegrity, the application reads its contents and displays the supported note files found at that time. The sidebar reflects the state of the folder as it existed when it was last loaded or refreshed.
Notegrity does not maintain a continuous, live connection to the file system. Changes made outside the application—such as creating, renaming, deleting, or modifying files using another program or the operating system’s file manager—are not automatically detected. To update the sidebar and ensure that the displayed information matches the current contents of the folder, a manual refresh is required.
To refresh the active folder, select:
File → Refresh Notes
You may also use the associated keyboard shortcut shown in the menu.
Refreshing performs a new scan of the currently open folder. During this process, Notegrity:
- Re-reads all supported .txt and .md files
- Updates note titles and modification timestamps
- Detects newly added or removed files
- Reorders notes according to the current sort mode
Refreshing does not modify file contents, it simply updates Notegrity’s view to match the current state of the folder on disk.
If you frequently edit notes outside of Notegrity or synchronize files using third-party tools, it is advisable to refresh the folder before continuing work to ensure you are viewing the most current version of your files.
Multi-Note Workflows
Notegrity allows multiple application windows to be open simultaneously. This enables you to view and edit different notes side by side, compare documents, reference one note while writing another, or work across separate folders without interrupting your current session.
To open an additional window, select:
File → New Window
Each new window operates independently. You may:
- Open a different notes folder in the new window
- View separate notes from the same folder
- Use different sort modes or preview states per window
- Work on multiple notes without switching back and forth in a single interface
All windows interact directly with the file system. Changes saved in one window are written immediately to disk. If another open window is displaying the same folder, you may need to use File → Refresh Notes to ensure it reflects the most recent updates.
Opening multiple windows does not duplicate or copy your notes. Each window is simply another view into the files stored on your system.
Note Search
Notegrity includes a built-in search function for locating notes based on their contents. The search field is located at the top of the sidebar and filters notes within the currently open folder.
Search operates on the full text of each supported .txt and .md file in the active folder. As you type, the sidebar dynamically narrows the list of notes to those containing the entered term. The search applies only to the folder that is currently loaded; it does not search across multiple folders simultaneously.
Search is text-based and does not rely on tags, metadata, or indexing services. Results are determined solely by the presence of matching text within each file.
For best results, it is recommended to enable Markdown Preview when searching. When preview mode is active, matching search terms are visually highlighted within the rendered document. This makes it easier to identify where and how a term appears in context.
Writing Notes
To create a new note, click the New Note button in the sidebar. A blank note will open in the editor, where you can begin typing immediately.
All notes in Notegrity are written as plain text. This means that what you type is saved directly as standard text characters, without hidden formatting, embedded styling, or proprietary document structure. Plain text ensures that your notes remain lightweight, portable, and readable in any text editor.
Notegrity does not automatically save notes. You must explicitly save your file to write it to disk.
It is strongly recommended that you save a new note shortly after creating it to establish its file location. Until a note has been saved, it does not yet exist as a file on your system and may be lost if the window is closed or the application exits unexpectedly.
Once saved, the note’s filename will represent its title in the header section minus the file extension. For example, a note file titled “favorite-recipes.txt” will appear as “favorite-recipes” in the header, so it is advised that you name your note files according to how you’d like them represented in the header section of the editor.
While writing, you should also save periodically to ensure your latest changes are preserved. Saving writes the current contents of the editor directly to the note file on disk.
Markdown Preview
Markdown is a standardized syntax for styling and formatting plain text and is used by many other note-taking apps.
Markdown Preview allows you to view how a note will appear when its Markdown syntax is rendered as formatted content. When enabled, Notegrity interprets Markdown notation—such as headings, lists, links, emphasis, and other supported elements—and displays the result as a styled document rather than raw text.
Markdown Preview can be toggled using the switch located in the top-right corner of the editor. Switching it on changes the editor view to a rendered preview; switching it off returns to the plain text editing view.
Notegrity uses the Marked parsing standard for Markdown rendering. Any syntax supported by Marked will render accordingly in preview mode.
Editing Behavior
Markdown Preview is a read-only view. Notes cannot be edited while preview mode is active. To make changes, you must disable preview and return to the plain text editor.
This distinction reflects Notegrity’s design: it is fundamentally a plain text editor. Markdown rendering is provided solely as a visual aid to help you review formatting, structure, and layout without altering the underlying file.
Markdown Insertion Bar
The Markdown Insertion Bar allows you to input common markdown syntax without having to memorize them. The controls are as follows:
- Increase/Decrease Text: These two controls, depicted as “Aa -” and “Aa +” are for shrinking and enlarging the size of the note contents on your screen. They do not change the size of the text but rather magnifies your view of it.
- Header: A shortcut for inserting markdown headers, normally prefixed with hash marks.
- Bold: Markdown syntax for bold text. When clicked, it generates four asterisks. Text is to be placed between them for the effect to display in markdown preview. For best results, it is advised to highlight your text first and then click the Bold button, which will wrap the text in the syntax. You can also use the keyboard shortcut Control/Command + B.
- Italic: Markdown syntax for italic text. It works the same as the Bold function but wraps the text in a single asterisk instead of two. Can also be applied with the keyboard shortcut Control/Command + I.
- Bullet: Creates a bulleted list by inserting “- ” or prefixing lines of selected text with it.
- Num: Creates a numbered list by inserting “1 ” or prefixing lines of selected text with it. All lines will be prefixed with the number 1 in plain text. The list becomes numbered once markdown preview is enabled.
- Divider: Inserts a visual divider or line break.
- Quote: Prefixes lines of text with the markdown syntax for quote blocks, which is “> “. You can select multiple lines and paragraphs of text.
- Strike: Wraps selected text with the markdown syntax for strikethrough text, which is “~~”.
- Check: Used for creating checklists, it inserts a check box with the check filled in, indicating a completed task.
- Uncheck: Also used for creating checklists, it inserts an empty check box, indication a task that has yet to be completed.
- Highlight: Makes selected text appear highlighted in markdown preview.
- Inline: Creates an inline code block by wrapping selected text in markdown syntax. Ideal for stylizing code snippets and keyboard shortcuts in stylized text.
- Code: Wraps selected text in the markdown syntax for code blocks. Ideal for depicting blocks of code within a stylized box in markdown preview.
- Timestamp– Generates a tag with the current time and date based on when you clicked it. Good for documenting times and dates without having to rely on the file’s last modified date.
- Web Link: Creates a clickable link to a website by wrapping selected text in markdown syntax. When rendered and clicked in markdown preview, the link is opened in your computer’s default web browser.
- Note Link: Allows you to link to other notes within your notes folder. When clicked, you’ll be prompted to choose a note file to link to. Please note that you must choose a note from within the same notes folder for this feature to work. You cannot link to a note file in another folder.
- Image: Allows you to insert images into your notes. When clicked, you’ll be prompted to choose an image and markdown syntax for the selected image will be inserted into the note. The image will be displayed when markdown preview is enabled. Please note that you must save your note and choose an image from within the same notes folder for it to work.
- YouTube: Inserts a faux YouTube embed within your note file. When clicked, you’ll be prompted to paste the URL of a YouTube video. When markdown preview is enabled, the video’s thumbnail will be displayed with a play button overlayed. When clicked, the video will be opened in your computer’s default web browser. Videos do not play within Notegrity.
Deleting Notes
Notes can be deleted from the sidebar by clicking the trash icon next to the note’s title. This action removes the note immediately.
When a note is deleted, its corresponding file is permanently removed from your computer. Because Notegrity works directly with files stored on disk, deletion is not limited to the application interface—it affects the actual file in your selected folder. You should confirm that you no longer need a note before deleting it.
If you delete a note that has not been saved, any text currently written in it will be lost. Unsaved notes exist only in memory and are not stored on disk, so deleting them discards their contents entirely.
Renaming Notes
To rename a note, click its title at the top of the editor, type the new name, and press Enter to apply the change. This updates the note’s filename on your computer while preserving its existing file extension (such as .txt or .md).
Because Notegrity works directly with files stored on disk, renaming a note changes the actual filename in your folder, not just its label inside the application.
Notes that have not yet been saved cannot be renamed. A note must first be saved to disk before it has a filename and file location. Until then, it exists only as an unsaved document in the editor and has no file for Notegrity to rename.
Pinned Notes
Pinned notes allow you to keep important files easily accessible at the top of the sidebar. To pin a note, click the pin icon next to its title. Pinned notes remain positioned above unpinned notes, regardless of the selected sort order.
Pin status is remembered between sessions. When you close and reopen Notegrity, previously pinned notes will remain pinned within the same folder.
Pins are associated with the note’s filename. If you rename a note, it will lose its pinned status because the application recognizes it as a new filename. If this occurs, you can simply pin the note again under its new name.
Marked Notes
Marked notes provide a way to visually distinguish specific notes without affecting their position in the sidebar. Unlike pinned notes, marking does not change a note’s order or sorting priority. It is intended purely as a visual indicator to help you identify notes of interest.
To mark a note, click the star icon next to its title. Clicking the icon again will remove the mark.
You can filter the sidebar to display only marked notes by selecting:
View → Marked Only
When this filter is enabled, the sidebar will temporarily show only notes that have been marked. Disabling the filter restores the full note list.
Saving & Supported Formats
To save a note, select:
File → Save
You can also use the keyboard shortcut shown in the menu, or click the save status icon at the bottom-right of the editor. If the note has not yet been saved, you will be prompted to choose a file name and location. Once saved, subsequent saves will write changes directly to that file.
The save status indictor will fill with a solid color when saved. Notes with unsaved changes are depicted with a colorless outline.
Supported Save Formats
Notes can be saved in one of two plain text formats:
.md (Markdown)
This is the default save format. Markdown files are widely supported by modern note-taking applications and editors. Saving as .md helps maintain compatibility with other tools that recognize Markdown syntax and structure.
.txt (Plain Text)
Standard text files without a Markdown-specific extension. These files remain universally compatible across systems and editors.
Although .md is the default option due to its broad interoperability with other note-taking applications, .txt files are fully supported in Notegrity. Markdown syntax will still render correctly in Markdown Preview mode even if the file uses a .txt extension.
PDF Export
Notegrity allows you to export notes as PDF documents for sharing, printing, or archiving. To export the current note, select:
File → Export PDF
This generates a PDF file containing the contents of your note exactly as it is rendered, with all supported Markdown formatting applied. Elements such as headings, lists, links, emphasis, and other styled content will appear in the PDF as formatted text rather than raw syntax.
The export process does not modify your original note file. It simply creates a separate PDF copy based on the note’s current contents.
Dark/Light Themes
Notegrity includes two visual themes: Dark and Light. These themes adjust the appearance of the interface to suit different viewing preferences and lighting conditions.
By default, Notegrity follows your operating system’s theme setting. If your system is set to dark mode, Notegrity will use the dark theme. If your system is set to light mode, Notegrity will use the light theme. This allows the application to remain consistent with your system’s overall appearance.
You can manually change the theme at any time by selecting:
View → Theme
From there, you may choose between Light, Dark, or System (automatic).
Theme Color
Notegrity allows you to customize the interface accent color used throughout the application. The theme color affects visual elements such as buttons, graphs, indicators, and other interface accents, allowing you to personalize the appearance without changing the overall theme (Light or Dark).
To change the theme color, select:
View → Theme Color
You will be prompted to enter a hexadecimal color code (HEX) of your choice. After entering a valid code, the interface will update to reflect the selected color.
Theme color changes apply only to the application’s interface and do not affect your notes or file contents.
Show/Hide Panels
Notegrity allows you to customize the workspace layout by showing or hiding certain interface panels. This makes it possible to adjust the interface based on your workflow, screen size, or focus preferences.
To toggle panel visibility, use the options located in the View menu. From there, you can enable or disable elements such as:
- Sidebar: Displays the list of notes in the current folder
- Insights Panel: Shows note statistics and related information
When a panel is hidden, it is removed from view but not disabled. You can restore it at any time by re-enabling it from the menu.
Hiding panels can be useful when working on smaller displays, reducing visual clutter, or creating a distraction-free writing environment. Showing panels again restores full access to their features without affecting your notes or settings.
Focus Mode
Focus Mode provides a distraction-free writing environment by hiding all interface elements except the editor. When enabled, panels, menus, and other on-screen controls are temporarily removed from view so you can concentrate solely on your note.
Focus mode can be toggled by going to:
View → Focus Mode
Focus Mode is intended for uninterrupted writing sessions, editing drafts, or any situation where a minimal interface is preferred. It does not change your note, settings, or layout permanently—only the visible interface while the mode is active.
Markdown Preview can still be toggled while in Focus Mode using its keyboard shortcut. This allows you to switch between plain text editing and rendered preview without leaving the focused workspace.
Insights Dashboard
The Insights Dashboard provides a collection of analytical panels designed to help you better understand your notes and writing activity. Rather than focusing on editing, this section presents information about your files, patterns, and progress within the currently loaded folder.
Each card displays a different type of insight, allowing you to review aspects of your notes from a broader perspective. Insight cards can be collapsed and expanded by clicking on their headers.
The dashboard is intended as a supplemental workspace that complements writing and organization by making underlying information easier to see and interpret. Insights are calculated within Notegrity and are not stored, shared, analyzed or transmitted anywhere else.
The sections below describe each card and the data it presents:
Activity Heatmap
Displays a visual timeline of your writing activity, showing when notes were modified. More active days appear more prominently, making it easy to identify writing patterns and periods of productivity.
Text Metrics
Provides statistics about the current note’s content, such as character count, word count, and other basic measurements that help you gauge note length and density.
File Metadata
Shows technical information about the selected note file, including its creation date, last modified date, and file size.
Folder Metadata
Summarizes information about the currently opened folder, such as the total number of notes and the combined size of all supported note files.
Linked Notes
Displays notes that are connected through internal links, helping you see relationships between documents and navigate your note network more easily.
Task Progress
A visual aid for checklist completion within a note that calculates how many task items are finished versus remaining.
Keyword Clusters
Highlights frequently used words or recurring terms within the selected note or the entire folder, helping you identify themes, topics, or patterns in your writing.
Lock Screen
The Lock Screen provides a quick way to temporarily restrict access to Notegrity while the application is open. When activated, it places an overlay over the interface that blocks all note content until the correct passcode is entered.
Before you can lock the screen, you must first create a passcode. To do this, go to:
Security → Set Passcode
Once a passcode has been set, you can lock the application at any time by going to:
Security → Lock Screen
When locked, the overlay remains in place until the correct passcode is entered.
The locked state is preserved between sessions, meaning Notegrity will remain locked if it was locked when last closed.
If you forget your passcode, you will need to contact support for assistance.
Purpose and Limitations
The Lock Screen is intended as a privacy feature rather than a hardened security system. It is designed to prevent casual access to your notes—for example, when stepping away from your desk briefly—so that someone passing by cannot immediately view your content.
It does not encrypt or hide your note files at the system level. Because notes are stored as standard files on your computer, they can still be accessed through your operating system’s file browser. Users who require stronger protection should use Notegrity’s encryption features or additional system-level security measures.
Note Encryption
Notegrity supports encryption for individual note files. When a note is encrypted, the readable contents of the file are replaced with encrypted data. The note can then be opened in Notegrity only after entering the correct password.
Encryption is applied at the file level. An encrypted note remains a standard .txt or .md file on disk, but its contents are no longer human-readable when viewed in another editor or through the file browser.
What Encryption Does
When you encrypt a note:
- The note’s plaintext content is encrypted and replaced with ciphertext.
- The file remains in its original location and retains its original file extension.
- The note can be decrypted and viewed again only by providing the correct password.
Encryption does not rely on an online service, account, or sync system. The encrypted note is fully self-contained within the file.
Encrypting a Note
To encrypt a note, use:
Security → Encrypt Note
You will be prompted to enter a password for that note. Notegrity uses the password only to derive an encryption key. The password is not stored in plaintext within the note file.
After encryption, the note will appear locked and cannot be read until it is decrypted.
Decrypting a Note
When you open an encrypted note, Notegrity will prompt you for the note’s password. If the password is correct, Notegrity decrypts the file contents and displays the plaintext in the editor.
If the password is incorrect, the note cannot be decrypted.
Notes will remain decrypted for the duration of the session. Once Notegrity is closed and relaunched again, you will need to enter your password to decrypt the note.
Cryptography Used
Notegrity’s encryption format uses:
- AES-256-GCM for encryption: provides both confidentiality (the content is unreadable) and integrity/authenticity (tampering is detected during decryption).
- scrypt for key derivation: a cryptographic key is derived from the password using scrypt and a per-note random salt.
A randomly generated:
- salt (16 bytes) for scrypt
- IV (12 bytes) for AES-GCM
Because the salt and IV are random per note, encrypting the same text with the same password will produce different encrypted output each time.
Passwords and Recovery
Passwords are not recoverable! If you forget the password for an encrypted note, the note cannot be decrypted.
For this reason:
- Use a password you can reliably reproduce.
- Consider using a password manager.
- Avoid encrypting important notes with passwords you may lose.
Interoperability and Decrypting Outside Notegrity
Encrypted notes can be decrypted outside of Notegrity, but only by using software that implements the same format:
- Read the file’s JSON header (salt, IV, tag, etc.)
- Derive the key from the password using scrypt
- Decrypt the Base64 ciphertext using AES-256-GCM with the derived key, IV, and tag
Notegrity does not currently provide a separate command-line utility for decryption. If you later add one, it would simply implement the same process described above.
Important Limitations
- Encryption protects the contents of an encrypted note file on disk, but it does not hide the existence of the file or its filename.
- Encryption does not automatically encrypt all notes; it is applied per note.
- Temporary plaintext may exist in memory while a note is open and unlocked.
- If you export or copy decrypted content elsewhere, those copies will not be encrypted unless separately protected.
Leave a Reply